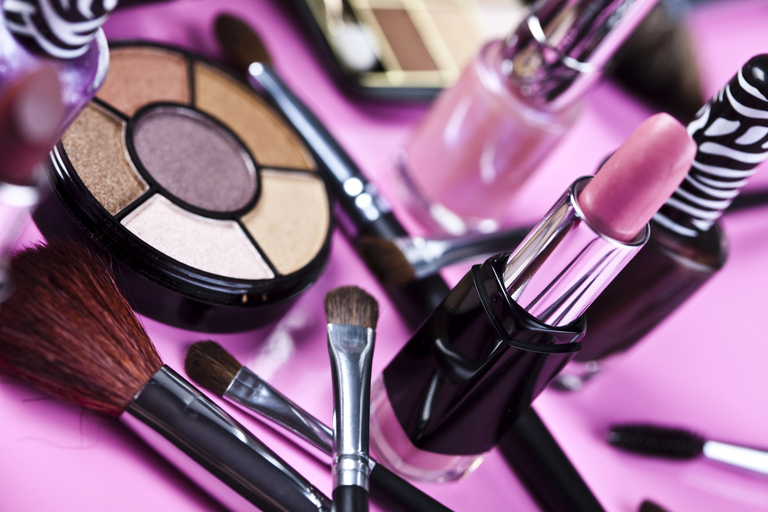
If you use makeup, you probably belong to one of these 2 categories. Either you have lots of beauty products, and it starts to be too many, or you keep your favorite ones for maybe a little too long. Good news: Today, I’ll show you how to declutter makeup and start organising cosmetics, so you’ll feel more serene when it’s time for a bit of glow-up!
Decluttering makeup: why it’s important?
When did you declutter your cosmetics for the last time? Was it during your last seasonal cleaning, or more like a few years ago? It’s not as obvious as with food, but beauty products also have expiration dates.
Has it already happened to you to open a cosmetic jar and find that it smelled weird? You bet right: it must have been past its expiration date.
The result can go from a beauty product not doing what it was supposed to to a health issue if, for example, you use an old, contaminated mascara and get an eye infection.
How to declutter makeup
Start your makeup declutter session with the old beauty products
Old beauty products can become inefficient or even dangerous to use, as germs and bacteria can contaminate them. So it’s best to get rid of your older products.
-
Save
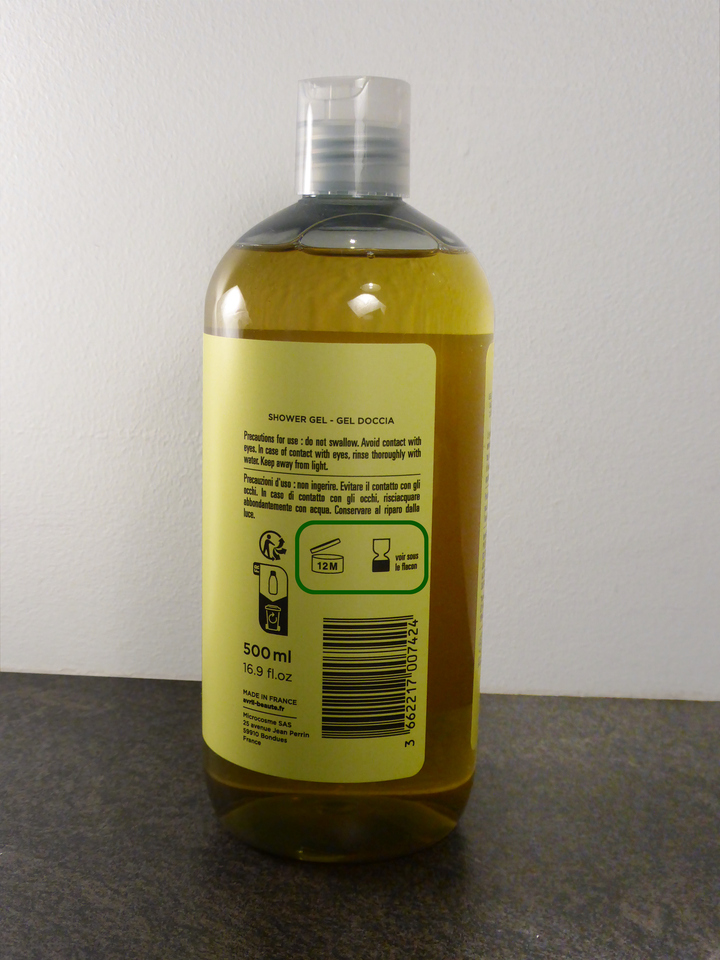
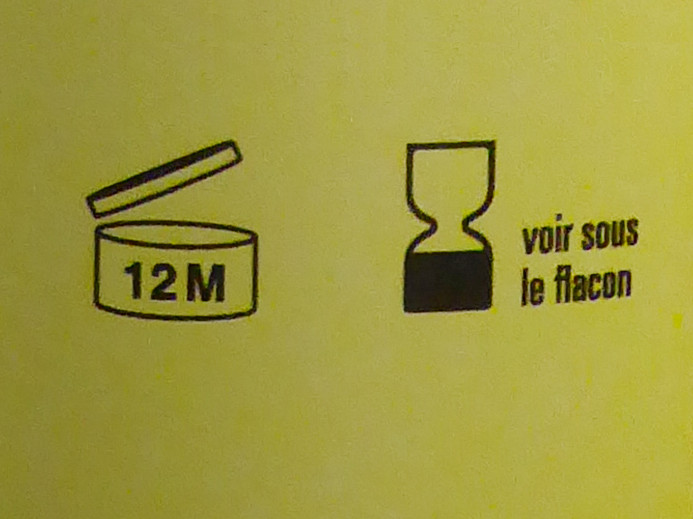
There are several ways to know if your makeup product is too old. First, you can look for 2 icons on the packaging. The 1st one is an hourglass. The date written after it is a best-before date. It indicates the date after which you should be careful before using the product.
The 2nd one is a jar with an open lid and a number. It indicates the duration in months during which the product is safe to use after you’ve opened it.
-
Save
The other method is to use your senses. Has the product smell changed? Is the color or the texture different? If so, it’s safer to throw away the product.
Keep going with the unloved cosmetics
Our style changes over time. It’s true for our clothes, but also our makeup.
Once you’ve removed the older beauty products, you can now remove those you don’t need anymore. To do so, I’ve got 3 questions for you :
- Do you still use them?
If you didn’t use them before your makeup declutter session, there’s little chance you’ll start using them again after it. - Do they fit with your style?
As said, our style changes. In the past, I had a period when I used bright eye shadows, and I had a huge palette with lots of them. Now, I’m more into nude makeup, so out went the palette! - Do you make time to use them?
Some beauty products are trickier to use, like eyeliners, when you’re not used to applying them. Do you have some products of that kind that you don’t have enough time to use them? Except if you know that you’ll have more time soon, I suggest you find them a new home (that home may be the trash can).

-
Save
Nominate your favorite cosmetic products
After the 2 first steps, you may still find yourself with duplicates. To see them more quickly, start by sorting your products by categories. The categories are up to you. If you have little makeup, a broad eyeshadows category will make sense, But if you have 10 palettes with at least 8 eye shadows in each, you might have a “bright eye shadows” category and a “subtle eye shadows” category.
Once everything is sorted out, select and keep those you prefer in each category.
Next decluttering step: Organizing your cosmetics

-
Save
Clean your makeup brushes and sponges
You must clean makeup brushes and sponges regularly to prevent the proliferation of bacteria and germs. You can use a specific cleaner for that task, but a gentle soap will work.
Before we start, there is one thing to know: you should avoid wetting the base of the brush head. That could damage it; it’s such a shame as you wanted to take care of the brushes!
First, put a few drops of your cleaner of choice in the palm of your hand. Then massage the tip of the bristles with the cleaner and rinse them thoroughly under water.
If your brushes are on the dirtier side, repeat the previous steps.
Then, gently squeeze as much water as you can and reform the head shape before laying the brushes flat to dry. Even if it’s tempting, don’t use a hair dryer. It could loosen the glue holding the bristles and make them fall.
-
Save
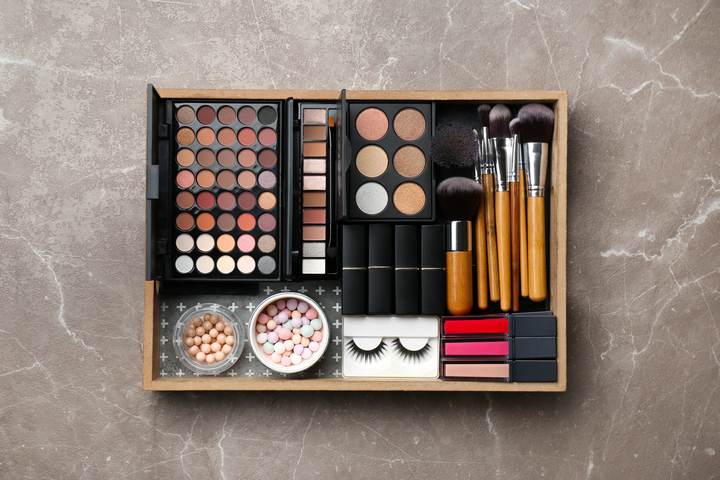
Organize your cosmetics by use
I suggest starting by organizing depending on where you apply the products. In my case, I have a drawer for foundations and bases, one for the eyes, and a third for the remaining. But you may need more organization. You can then sort by colors or occasions to use the products.
You can use bins or small drawer dividers to keep everything tidy. My makeup is on a shelf, and I bought a little acrylic 3-drawer box.
Be careful with sensitive beauty products
Before leaving you, I wanted to remind you a few things. Some products are more sensitive and need to stay in the fridge to avoid quickly deteriorating.
But even your other cosmetics products need to be used with care. I recommend you declutter them regularly to avoid skin or eye infections, for example.
-
Save
Don’t wait to start your makeup declutter session and organize those beauty products!
Having your makeup tidy will help you get ready more peacefully, so don’t wait to declutter it! First, get rid of the past-their-prim-date products. Then remove those you don’t use anymore, and finally, sort them to keep your favorites only. Bonus point if you add the organization steps!
Want to organize your kitchen after the bathroom? Look at my tips to organize it!
-
Save
Share via:


Be the first to leave a comment